Classic Apple Crisp: One Perfect Fall Hug.
There s just something magical about autumn, isn t there? For me, it always brings back memories of my grandmother s kitchen. The air would fill with the most amazing smells. Think cinnamon, nutmeg, and apples bubbling in the oven. It was pure comfort. That s why this Classic Apple Crisp recipe holds such a special place in my heart.
It s more than just a dessert; it s a hug in a baking dish. This recipe captures all that warmth and coziness. It reminds me of those simple, joyful moments around her table. I ve tweaked it just a little over the years. This makes it super easy for busy home cooks like us. You ll get tender baked apples with a sweet, buttery oat crumble. It s a delightful contrast. Get ready to fill your home with the best smells!

Why You ll Love This Classic Apple Crisp
I truly believe this classic apple crisp will become your new favorite. It s just so simple, yet incredibly satisfying. Here s why I think you ll adore it:
- It s super quick to put together.
- The flavors are pure comfort, just like fall.
- You get tender apples with a crunchy topping.
- It s perfect for any occasion.
- It fills your home with amazing smells.
It brings so much joy and warmth to any meal!
Essential Ingredients for Your Classic Apple Crisp
Gathering your ingredients is the first step. For this classic apple crisp, you ll need six medium apples. I love using a mix of Granny Smith, Honeycrisp, or Fuji. Make sure they are peeled, cored, and sliced. You ll also need a half cup of granulated sugar. Don t forget one teaspoon of ground cinnamon and a quarter teaspoon of ground nutmeg. A tablespoon of lemon juice brightens everything up.
For the crumble, grab one cup of all-purpose flour. Then, a half cup of packed light brown sugar. You ll need a half cup of old-fashioned rolled oats. Crucially, a half cup (that s one stick) of unsalted butter. It needs to be cold and cut into small pieces. Finally, a quarter teaspoon of salt balances the sweetness. These simple items truly make magic together!
Tools for Making Classic Apple Crisp
Having the right tools makes baking this classic apple crisp a breeze. You won t need anything fancy, just some basic kitchen items. First, grab a sturdy 9Ã13 inch baking dish. This size is just perfect for all those delicious apples. You ll also need a large mixing bowl for the apples. And a separate medium bowl for your crumble topping ingredients.
A good set of measuring cups and spoons is essential. I always keep mine handy. You might want a pastry blender. Or even two forks work great for cutting in the butter. A vegetable peeler and a corer will make apple prep easy. That s all you need to get started!
Crafting Your Classic Apple Crisp: Step-by-Step Instructions
Now for the fun part: putting it all together! Making this classic apple crisp is so satisfying. Just follow these steps, and you ll have a warm, bubbly dessert. It s truly easier than you think. Get ready to enjoy those amazing smells. Your kitchen will feel so cozy!
Preparing the Apples for Your Classic Apple Crisp
First, preheat your oven to 375 °F (190 °C). Lightly grease your 9Ã13 inch baking dish. In a large bowl, combine your sliced apples. Add the granulated sugar, cinnamon, nutmeg, and lemon juice. Toss them gently to coat every apple piece. Pour this lovely apple mixture into your prepared baking dish. Spread it out evenly.
Assembling the Classic Apple Crisp Topping
Next, let s make that irresistible crumble. In a separate medium bowl, mix the flour, brown sugar, oats, and salt. Now, add your cold butter pieces. Use your fingers, a pastry blender, or two forks. Cut the butter into the dry ingredients. Keep going until it looks like coarse crumbs. This creates that perfect texture. Sprinkle this topping evenly over your apples. Make sure it covers everything!
Baking Your Classic Apple Crisp to Perfection
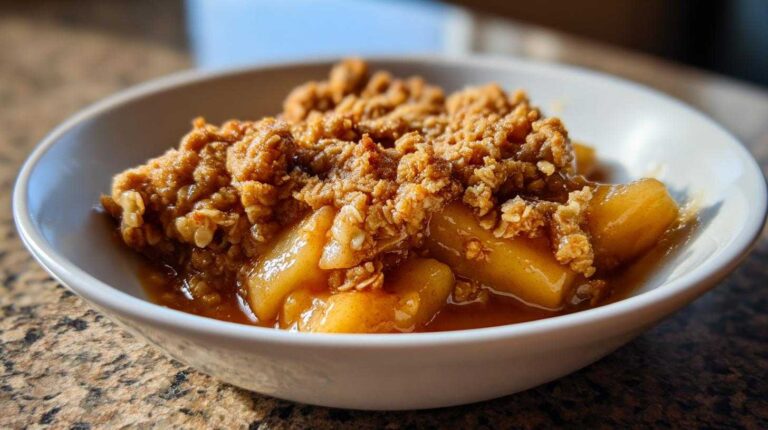
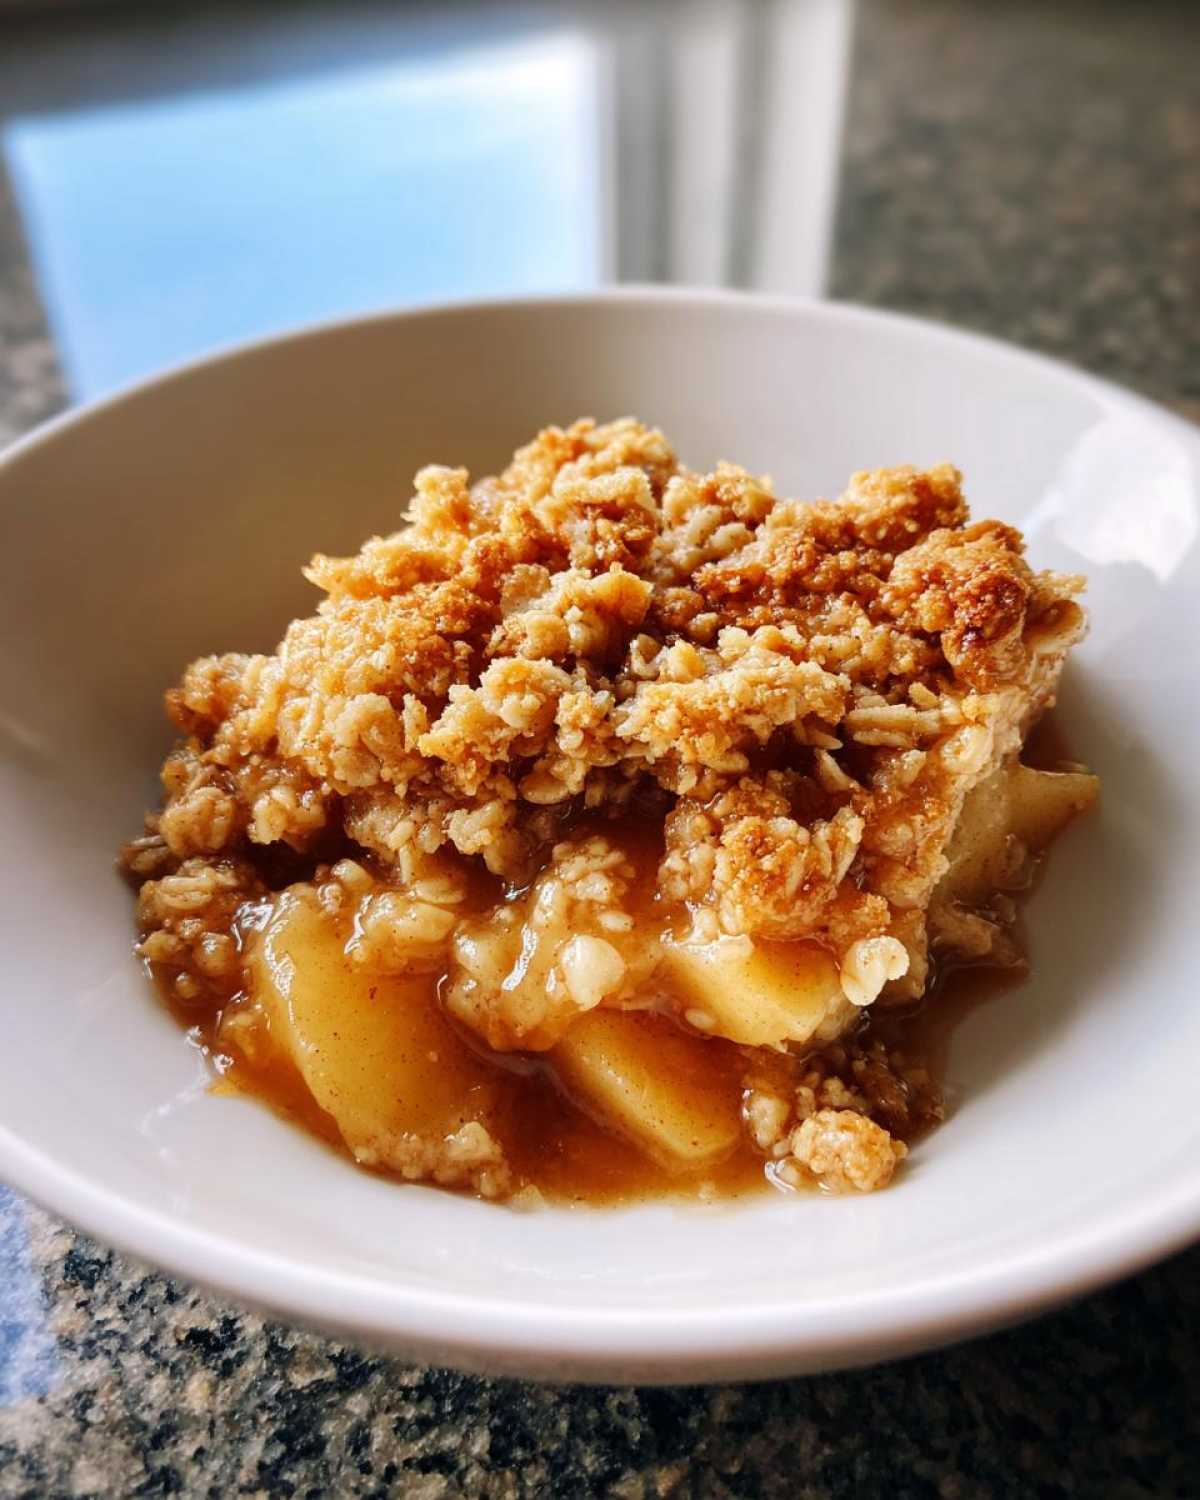
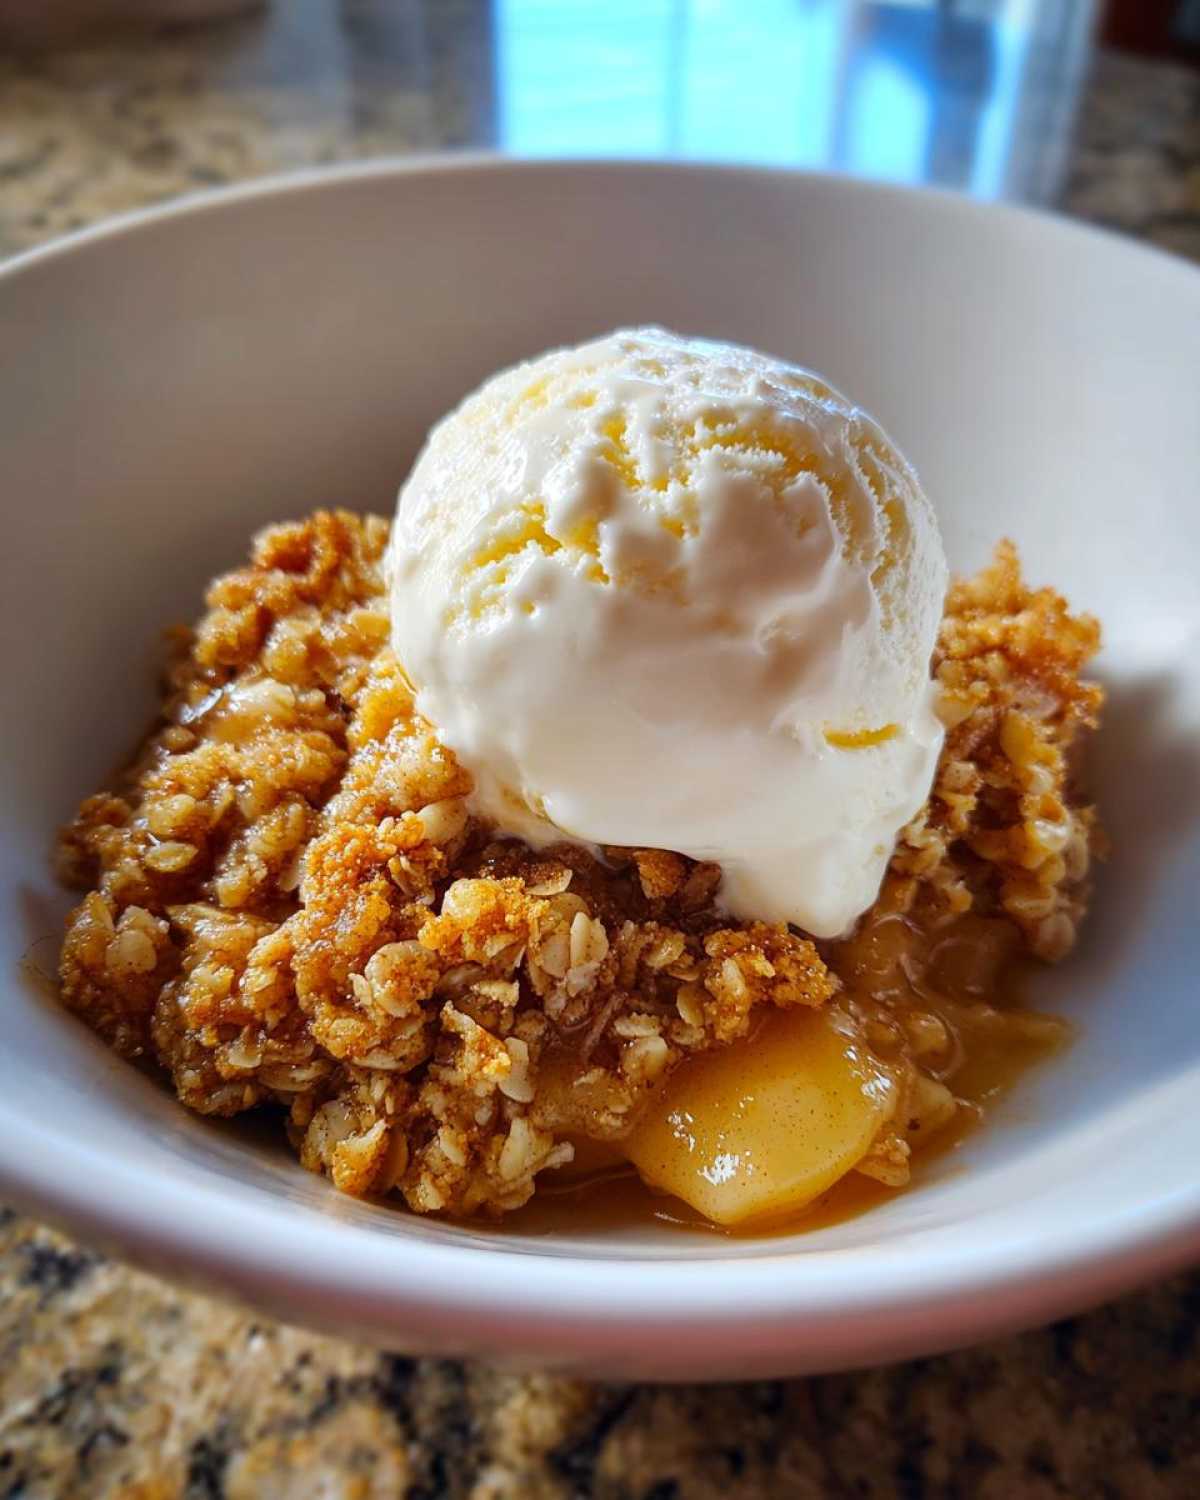
Pop your baking dish into the preheated oven. Bake for about 35 to 45 minutes. You want the apples to be tender. The topping should be golden brown and bubbly. Keep an eye on it! Once it s done, let it cool for 10-15 minutes. This lets it set up nicely. It s absolutely delicious served warm. Add a scoop of vanilla ice cream or whipped cream. Enjoy every single bite!
Tips for a Flawless Classic Apple Crisp
Over the years, I ve picked up a few tricks. These really make my classic apple crisp shine. First, don t be afraid to mix apple varieties. Granny Smith gives a nice tartness. Honeycrisp adds sweetness and texture. This creates a balanced flavor. Also, always use cold butter for the topping. It makes for a flakier, crispier crumble. Trust me on this one!
When baking, look for those golden-brown edges. You also want to see the apple juices bubbling. If the top browns too fast, loosely tent it with foil. This prevents burning. And let it rest a bit after baking. This helps the crisp set. It makes serving so much easier too. These little things make a big difference!
Serving and Storing Your Classic Apple Crisp
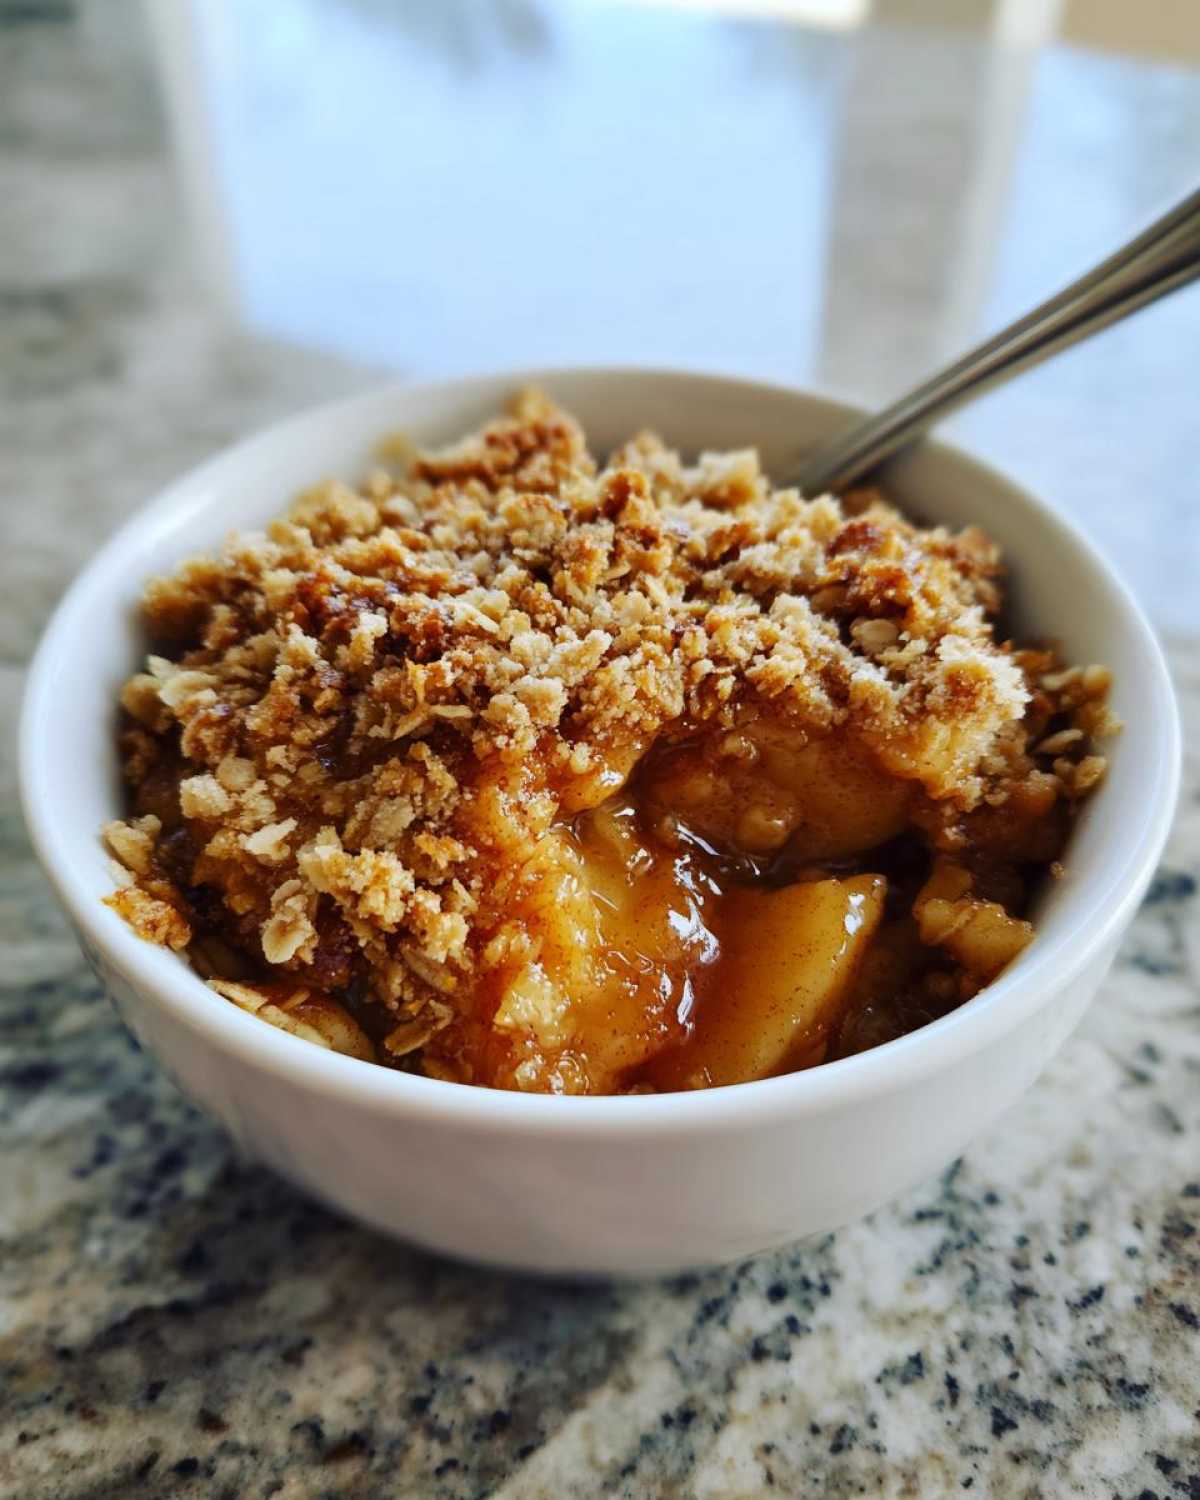
Once your classic apple crisp is out of the oven, the best part begins! I always recommend serving it warm. A big scoop of vanilla bean ice cream melting over the top is pure heaven. Or, a dollop of freshly whipped cream works beautifully too. That warm-cold contrast is just amazing.
If you happen to have leftovers, which is rare in my house, storing them is easy. Cover the dish tightly with plastic wrap. You can also transfer it to an airtight container. Pop it in the refrigerator. It will stay fresh for up to three or four days. To reheat, you can use the microwave for a quick warm-up. Or, gently warm it in the oven. This brings back some of that lovely crispness. Enjoy every last bit!
Common Questions About Classic Apple Crisp
I often get asked a few questions about this classic apple crisp. It s totally normal to wonder about ingredients or prep ahead. Here are some answers to help you out. I want you to feel confident making this delicious dessert. Let s make sure your crisp is perfect every time!
Can I use different types of apples in my Classic Apple Crisp?
Absolutely! I love mixing apples for the best flavor. Granny Smith apples offer a nice tartness. Honeycrisp or Fuji add sweetness and good texture. A blend gives you a complex and delicious classic apple crisp. Just make sure they are firm apples that hold their shape. This keeps your crisp from getting mushy.
How do I store leftover Classic Apple Crisp?
Storing leftover classic apple crisp is simple. Just cover the baking dish tightly. You can use plastic wrap or aluminum foil. Then, place it in the refrigerator. It stays good for about 3 to 4 days. You can also transfer it to an airtight container. This helps keep it fresh.
Can I prepare Classic Apple Crisp ahead of time?
Yes, you definitely can! You can assemble the entire classic apple crisp. Then, cover it tightly and refrigerate it. Do this for up to 24 hours before baking. When ready, just pop it into the preheated oven. You might need to add an extra 5-10 minutes to the baking time. This ensures it cooks through.
Nutritional Information for Classic Apple Crisp
I know many of you might be curious about the nutrition in this classic apple crisp. Please remember that nutritional values can vary. It depends on the specific brands you use. Also, the exact size of your servings changes things. This information is a general estimate only. It s not a precise calculation for your specific batch.
Share Your Classic Apple Crisp Experience
I truly hope you enjoy making this classic apple crisp as much as I do. There s nothing quite like sharing homemade treats. I d love to hear all about your baking adventure! Did you try a new apple blend? Or perhaps you added a special spice? Share your thoughts and photos with us!
Please leave a comment below. You can also rate the recipe. Your feedback helps our community. It inspires me to keep sharing. Happy baking, everyone!