Easy Cherry Crisp: 3 Ingredients for Pure Joy
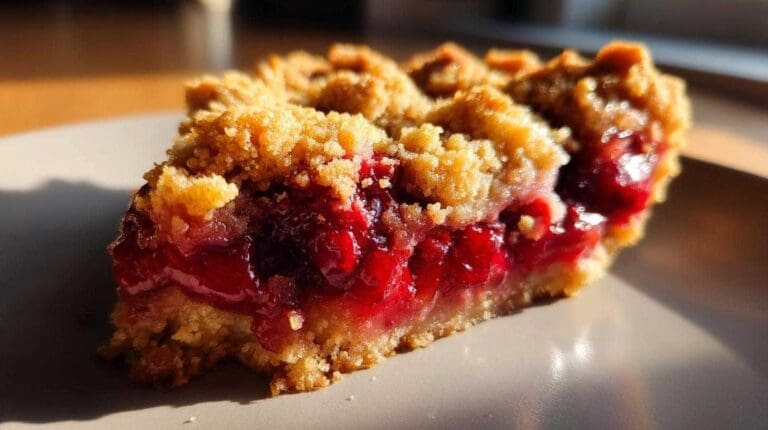
Growing up, our kitchen was the heart of everything. It smelled of yeast rolls on Sundays and cinnamon on holidays. But there was this one dessert, this , that always felt extra special. It wasn t fancy, not at all. It was just simple, warm, and tasted like pure comfort. My grandmother would whip it up with just a few things she always had on hand. The smell of those sweet cherries bubbling under that buttery, crumbly topping meant something wonderful was about to happen. It was the dessert we asked for on birthdays, after good report cards, or just because. Making this easy cherry crisp today still brings back all those happy memories for me. It s a recipe that proves delicious doesn t have to be difficult. It s quick, uses minimal ingredients, and tastes absolutely incredible. It s become a staple in my own home, a little piece of that same warmth I grew up with.
Why You ll Love This Easy Cherry Crisp
Honestly, what s not to love about this easy cherry crisp? It s become my go-to when I need a sweet treat without a fuss. Here s why I think you ll adore it too:
- It s incredibly fast to put together.
- You only need three simple ingredients.
- It tastes like pure, warm comfort in a dish.
- You can easily switch up the fruit for variety.
- It s a crowd-pleaser every single time.
Seriously, it takes the stress out of making dessert!
Ingredients for the Easy Cherry Crisp
Gathering your ingredients for this easy cherry crisp is a breeze! You only need a few simple things. Here s what you ll need:
- Two cans (21 ounces each) of your favorite cherry pie filling.
- One box (15.25 ounces) of yellow cake mix.
- One cup (that s two sticks!) of unsalted butter, melted down.
See? So easy!
Equipment Needed for This Easy Cherry Crisp
You won t need a lot of fancy gadgets for this easy cherry crisp. Just a few kitchen basics will do the trick!
- A 9Ã13-inch baking dish.
- A small bowl for melting the butter.
- A spoon or spatula for spreading.
That s really it!
Preparing Your Easy Cherry Crisp
Alright, let s get this easy cherry crisp into the oven! It s really simple, I promise. Just follow these steps:
- First things first, crank up your oven. You ll want it preheated to 375 °F (that s 190 °C).
- Grab your 9Ã13-inch baking dish. Pour those two cans of cherry pie filling right into the bottom. Use a spoon to spread it out evenly. You want a nice layer of those sweet cherries.
- Now, take your box of dry yellow cake mix. Sprinkle the entire box evenly over the cherry filling. Don t mix it in! Just let it sit on top like a cozy blanket.
- Next, drizzle the melted butter all over the dry cake mix. Try to get it as evenly distributed as you can. This is what helps create that lovely, crumbly topping.
- Pop the dish into your preheated oven. Let it bake for about 40 to 50 minutes. You ll know it s ready when the topping looks golden brown and you see the cherry filling bubbling up around the edges.
- Once it s baked to perfection, carefully take it out of the oven. Let it sit for a few minutes to cool down just a bit. It will be hot!
And there you have it! Your easy cherry crisp is ready to enjoy.
Tips for a Perfect Easy Cherry Crisp
Even though this easy cherry crisp is super simple, a few little tricks can make it even better! I ve learned these over the years.
First, make sure your butter is fully melted. This helps it spread nicely over the cake mix.
When you sprinkle the cake mix, try to get an even layer. This means you won t have dry spots.
Keep an eye on it while it bakes. Ovens can be different! You want that topping golden, not burnt.
If the top looks done but the filling isn t bubbling, give it a few more minutes.
Letting it cool slightly makes it easier to serve. The filling thickens just a bit.
Variations for Your Easy Cherry Crisp
While I adore the classic easy cherry crisp, sometimes it s fun to mix things up! This recipe is super forgiving, which I love.
- Swap the cherry pie filling for another kind. , peach, or even a berry mix works beautifully.
- Want extra crunch? Try sprinkling some chopped nuts, like pecans or walnuts, over the top before baking.
- A little cinnamon or a pinch of nutmeg mixed into the dry cake mix adds a lovely warmth.
Don t be afraid to get creative with your fruit crisp!
Easy Cherry Crisp Serving Suggestions
Now that your easy cherry crisp is baked and smelling amazing, it s time for the best part: serving it! For me, there s really only one way to go.
A warm scoop of this delightful cherry crisp is absolutely perfect with a generous dollop of whipped cream. The cool cream melts just right into the warm fruit and topping.
But if I m feeling extra indulgent, a scoop of vanilla ice cream is non-negotiable. The contrast is just divine!
Storing and Reheating Easy Cherry Crisp
Got leftovers of this delicious easy cherry crisp? Lucky you! It stores really well.
Just pop any uneaten crisp into an airtight container. Keep it in the refrigerator. It should stay good for about three days.
To reheat, you can warm individual servings in the microwave for a minute or two. For a crispier topping, put the leftovers back in the oven at 350 °F (175 °C) for about 10-15 minutes until warm.
Questions About Easy Cherry Crisp
I get a few questions about this easy cherry crisp sometimes. Here are some common ones I hear:
Can I use a different flavor of cake mix?
Absolutely! While yellow cake mix is my favorite for this cherry crisp dessert, a white cake mix or even a butter pecan mix would be delicious and add a different flavor twist.
What if I don t have unsalted butter?
Salted butter will work in a pinch. Just keep in mind it might make the topping slightly saltier. It won t ruin your easy cherry crisp, though!
Can I use fresh cherries instead of pie filling?
This recipe is really designed for pie filling because it already has thickeners and sweetness. Using fresh cherries would require adding sugar and cornstarch to get the right consistency, making it a different recipe altogether. For this super easy cherry crisp, stick with the canned filling.
How do I know when it s done baking?
You want the topping to be golden brown and the cherry filling bubbling up around the edges of the pan. That bubbling is a great sign it s heated through.
Nutritional Information
Please keep in mind that any nutritional information for this easy cherry crisp is just an estimate. It can change quite a bit depending on the exact ingredients and brands you use.
Share Your Easy Cherry Crisp Experience
I truly hope you give this easy cherry crisp a try! If you do, I d absolutely love to hear about it. Did you make any fun variations? How did you serve it?
Leave a comment below and tell me all about your experience. Or even better, share a photo of your creation! Happy baking!